Ultimate Rig For Catching Large Quantities Of Baitfish
- By: Sean Person
- on
How do you find it best to catch baitfish to use as bait for fishing?
What is your go-to baitfish rig setup?
Check out the ultimate rig for catching large quantities of baitfish down below!!
Don’t miss this!!
Best Setup For Catching Baitfish

This type of rig is perfect for catching pinfish, pigfish, grunts, croakers as well as any other type of baitfish that will strike it.
You can tip this rig with anything from squid and shrimp to Gulp! or FishBites.
Materials Needed
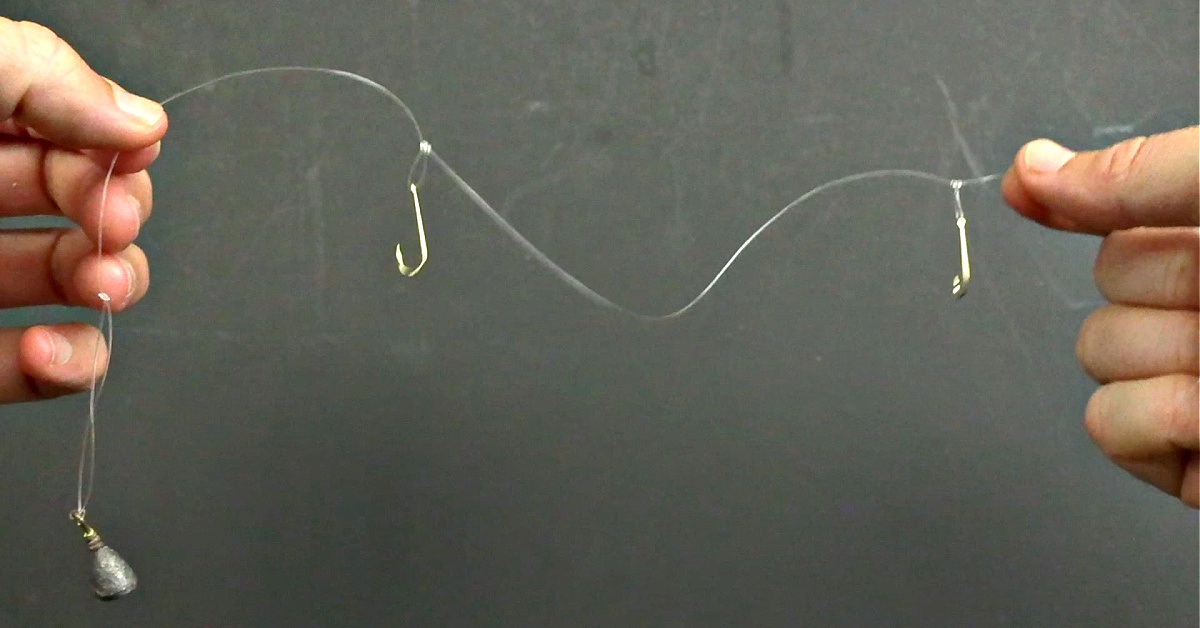
To set up this rig, you will need leader material, Eagle Claw Aberdeen size 8 hooks, and a bank sinker at the end.
It is easiest to use this type of weight because you are attaching it to your line via a loop that can easily be changed out for different weights.
Traveling With This Rig
If you are traveling with this rig already tied up or you are using a Sabiki type rig, there is a chance the rig gets hooked to its surroundings or to you.
To prevent that, just hook the hooks onto each other to prevent them from piercing or attaching to anything around them and to protect the rig itself from breaking.
You can use the loop on the end of the rig to secure the hooks and keep tension on them so they are not flying around during transport.
Rig Assembly
To begin, you slide a hook down the tag end of the line.
That tag end will be where the weight of the rig finally is attached.
When you thread the line through the hook, you want the hook point to be facing the tag end of the line.
You want to thread the hook down depending on how many hooks you want to include in the rig.
This can range from 2-6 hooks.
Once you have the hook placed where you want, tie a basic overhand knot.
Make sure the hook is resting at the bottom of the loop in the overhand knot.
At this point, you want to pull the line together until there is a loop about the same size of the hook itself.
Next, you want to take the tag end of the line and feed it through the back end of the loop.
In order to secure the dropper knot, you need to separate the coils at the top.
A simple cheat when working with thin line is to use the point of the hook and wedge it in between the first coil.
Now, you want to perform another overhand knot through the small section of the loop next to the hook.
Repeat this process one more time.
In total there should be 4 turns with the hook splitting them in the middle.
To secure the knot, push the hook up a bit and size up the loop you want holding the hook.
Apply saliva to the knot and cinch it down to tighten.
You must repeat this exact same process for each hook you want to include in your rig.
Connecting The Weight To The Rig
Bank weights will save you time and money because of how they are designed.
The large loop on the weight makes it easy to put the weight on and take it off if needed.
The easiest way to tie a loop at the end of this rig for the weight is a double overhand knot.
Create a loop in the line by bringing the tag end around the main portion of the line.
With the doubled line, form a circle and take the loop at the end and feed it through the circle with the double line.
Repeat this process again to strengthen the knot.
Now you have your loop for attaching the desired weight to the end of the rig.
To attach the weight onto the rig, pinch the end loop and slide it through the eye of the weight.
Then take the weight and slide it through the loop of the line and tighten.
Best Setup For Catching Baitfish

Featured Equipment:
Conclusion
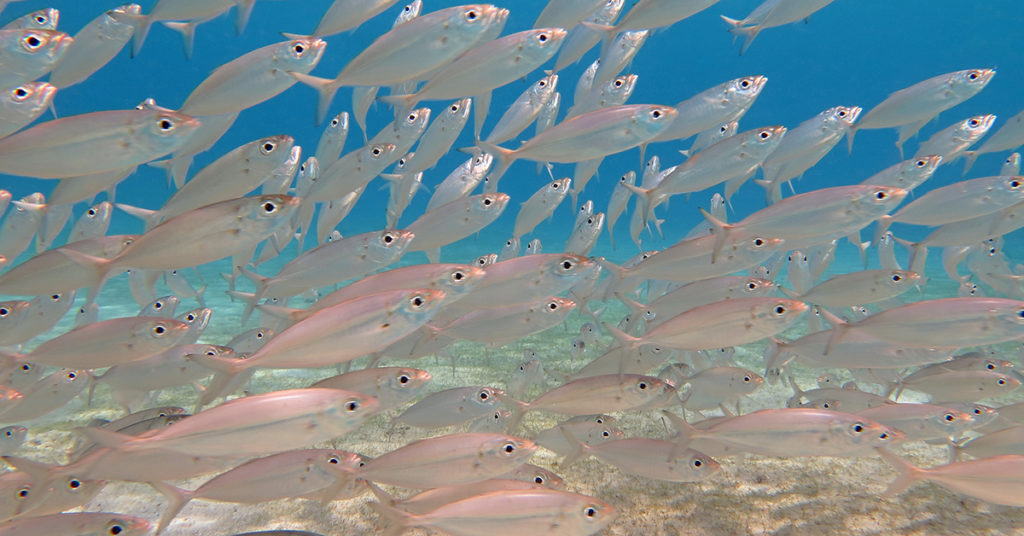
The Ultimate Baitfish Rig is perfect for catching a wide variety of bait swimming down near the bottom.
When it comes to pinfish, pigfish, croakers, grunts, and more, this rig will succeed!
Be sure to tip the hooks with some sort of live or artificial bait and you’ll have live bait in no time!
Do you have any more questions or suggestions on this rig assembly?
Let me know down in the comments below!
And if you know someone who wants to learn more about the ultimate rig for catching baitfish, please TAG or SHARE this with them!
P.S. Want access to our best fishing spots and tips, plus discounts to our online tackle store? Click here to join us in the Insider Club!
Related Articles:
Related categories:
STOP WASTING TIME ON THE WATER!
Do what the “SMART ANGLERS” are doing and join the Insider Club.
Here’s what you’ll receive today when you join:
- Weekly fishing reports and TRENDS revealing exactly where you should fish ever trip
- Weekly “spot dissection” videos that walk you through all the best spots in your area
- Exclusive fishing tips from the PROS you can’t find anywhere else
- Everything you need to start catching fish more consistently (regardless if you fish out of a boat, kayak, or land).
STOP WASTING TIME ON THE WATER!
Do what the “SMART ANGLERS” are doing and join the Insider Club.
Here’s what you’ll receive today when you join:
- Weekly fishing reports and TRENDS revealing exactly where you should fish every trip
- Weekly “spot dissection” videos that walk you through all the best spots in your area
- Exclusive fishing tips from the PROS you can’t find anywhere else
- Everything you need to start catching fish more consistently (regardless if you fish out of a boat, kayak, or land).





Awesome…Thank you Luke for another great lesson.
Use a small paper clip instead of hook to wedge and create loop. Slide paper clip off which then allows the finished loop to interchange hooks
Cool idea Ed!
What a clever way to tie a dropper loop! Luke you are a genius , thank you . Also I would like to wish Everyone at Salt Strong a Happy New Year and all the Best for
2022 . And thank you all just for being “SaltStrong”.
Thanks for the kind words Alan! Happy New Year!
Is this better than the last ‘ best dropper rig” ?
They all work just fine… it’s often more of a personal preference. This one is the technically best way to tie it based on the research I’ve done on the subject. But the double use of double overhand knots to form the loops is much faster and has almost as good of performance so I still use it when in a rush.
Hi Luke, Great rig! I have used basically the same rig but I make slightly larger loops and don’t incorporate the hook. This allows you to swap/replace hooks similar to the weights. Thanks again!
Thanks for sharing the helpful insight Ron!
If you find that the hooks on this rig are tangling with the line when the rig is dropping through the water column — most likely, the rig is “helicoptering” on its way down. If there’s any current, there’s a greater chance of helicoptering.
A quick and cheap solution is to slide a mini marshmallow over each hook so that the marshmallow holds the loop of mono going through the eye of the hook.
The marshmallow functions as a floating bumper to keep the hook off the vertical portion of the line, and it also prevents the hook from sliding along its loop.
Marshmallow will dissolve within a couple minutes, but you’ll probably catch your fish sooner than that… because baitfish seem to love marshmallow.
How cool! Plus it’s a good excuse for having some tasty treats out on the boat.
99% of the time, I find baitfish (grunt, pin, croaker, etc.) schooling mid-column or near the surface — not at the bottom. Therefore, I hold dropper rigs like this at whatever depth my fishfinder is seeing clouds of baitfish.
Additionally, instead of using a sinker on the end, I use a shiny weighted jig. Countless times, I’ve caught a decent fish (mackerel, bluefish, snapper, etc.) on the jig, while drifting over a school of baitfish.
Also, if you’re slow trolling, a flashy jig at the end of this rig will attract baitfish *and* predators to the rig.
Great tips Andy!
Great tip Luke! Just curious what the ideal spacing is between the weight and hooks. They seem to be about 6” apart if I had to guess based on the video?
Thanks Jeffrey! I generally make mine about 6 to 8 inches apart. Not sure if there’s a technically superior gap or not though.
Simple knot tying, inexpensive, and effective baitfish rig. Thanks, Luke!
Thanks for making time to post the nice comment Rob!
Luke why turn the hook down instead of up? Just curious I fish a lot with a drop shot rigs and have always tied it with hook up. I love this simple rig. I’m not a big fan of the Sabielski rig. Most of them are only good for one time use. This rig would be available for multiple trips. Thanks and keep up the fantastic job you, your brother and your team is doing
Great question… the reason I do it with the hook point up is so that it is easier to wedge inside the twists when forming the dropper loop. Otherwise, I think it’ll work equally well either way.