How To Make A High Low Rig (For Sheepshead & Snapper)
- By: Tony Acevedo
- on
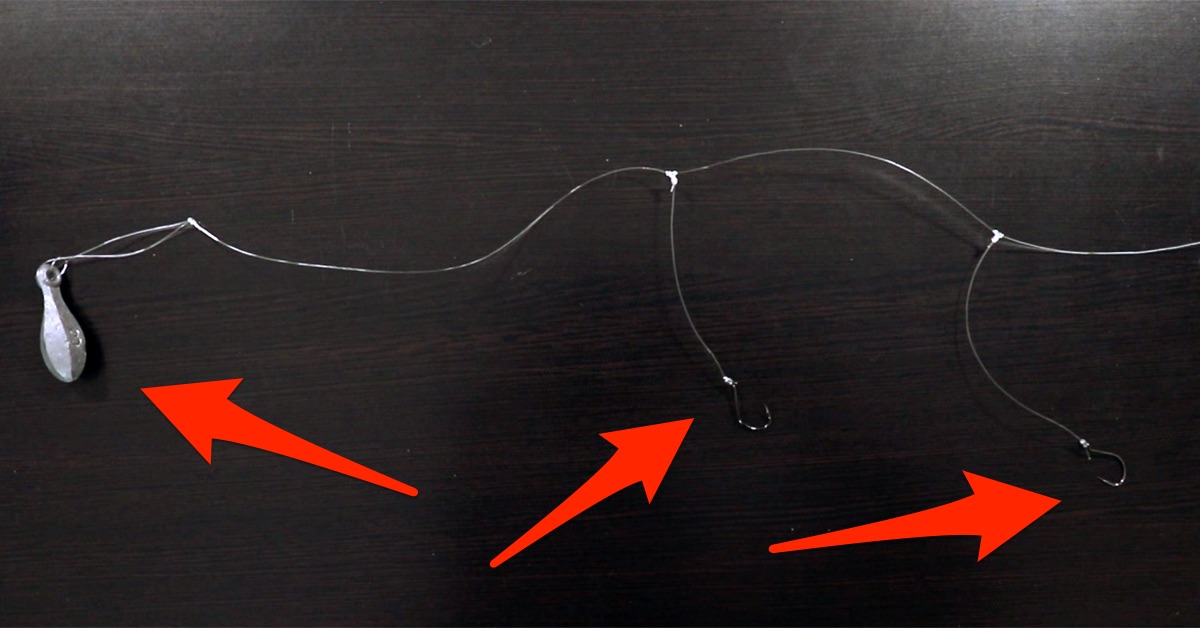
Want to learn how to make a high low rig?
This rig is really popular for surf fishing, but it’s also great for fishing around structure for tasty fish like sheepshead.
It can be a little complicated to learn how to tie, and definitely takes some practice to get it just right, but in this video, I’m going to show you exactly how to tie it, as well as some common mistakes that most people make (I made one of these mistakes, too!).
Let’s dive in.
How To Tie A High Low Rig [VIDEO]

This rig is a great rig, but like anything in life, there are pros and cons to it.
Pros:
- Two hooks can double the chance of you catching fish.
- Two hooks also allow you to test two different baits to see what the fish are eating.
- If one hook gets broken off, you still have another left.
Cons:
- It takes a long time to tie.
Here’s a list of materials you’ll need for this rig:
- A hook. I used a #1 Gamakatsu live bait hook (get it from Amazon here).
- Leader material. I used 30 lb mono (get it from Amazon here).
- Bank sinker. I recommend between 1-4 oz, depending on depth and current.
Now that you have all your materials, it’s almost time to get started.
But first, my last tip before starting to tie this rig is to stretch out your leader material.
This will make it a little thinner and get the coils out, which will make it easier to work with.
Alright, let’s get started!
Step #1: Make a loop
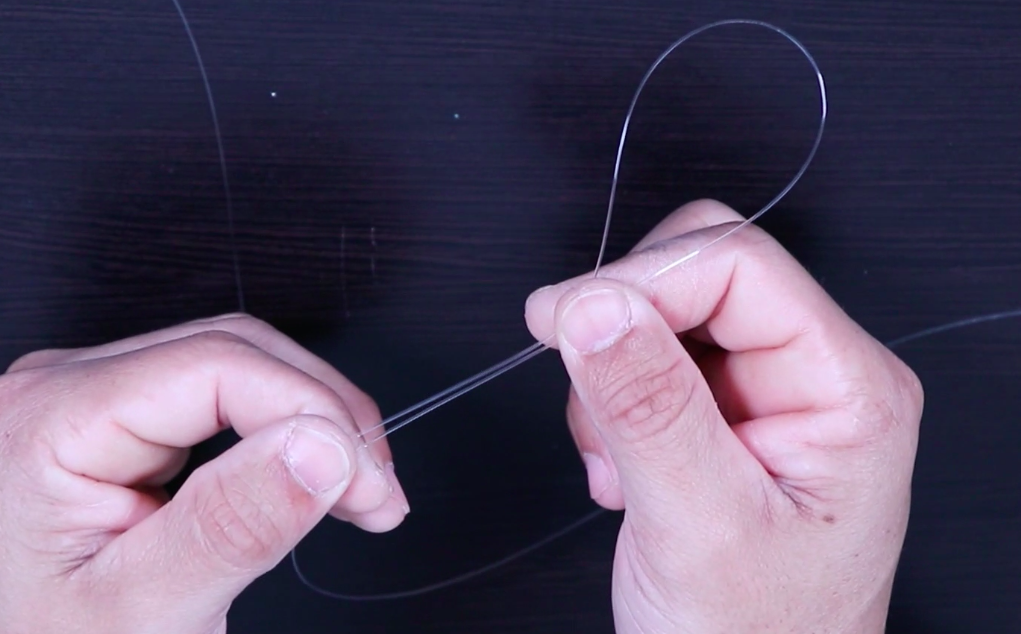
Give yourself plenty of line to work with here. I like about 2 feet of tag end from the loop.
Step #2: Tie 4-5 overhand knots with the loop
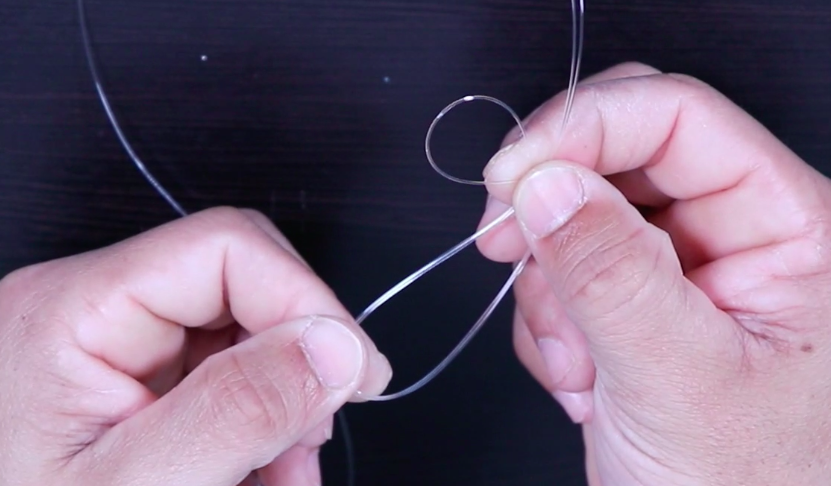
You want the loop to be about 3-4 inches in length.
Step #3: Cross the tag end over the main line
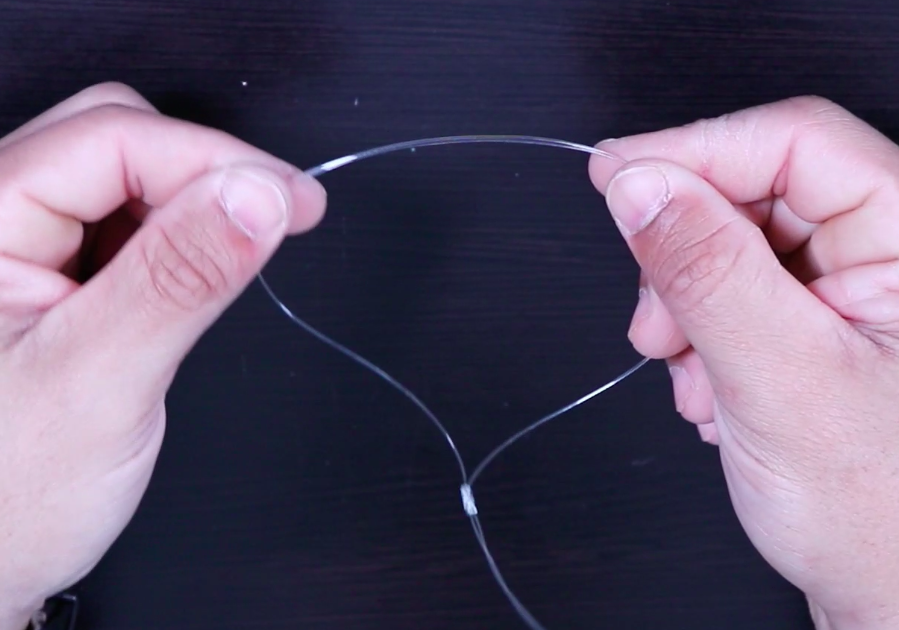
Step #4: Twist the line over itself 4-5 times
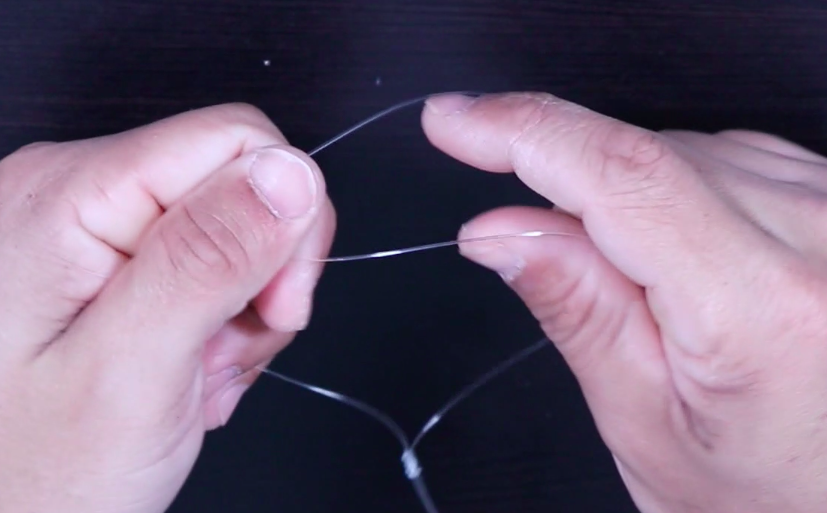
Step #5: Put the loop through the gap in the line
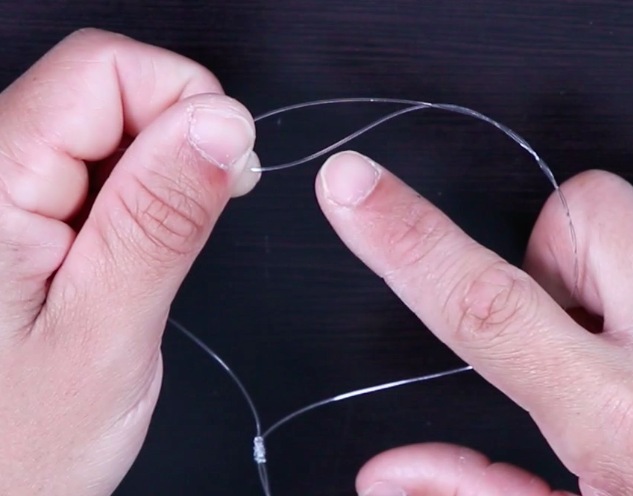
Make sure the knot gets through and slowly pull it tight.
You should be left with a T knot now, which is where your hook will go.
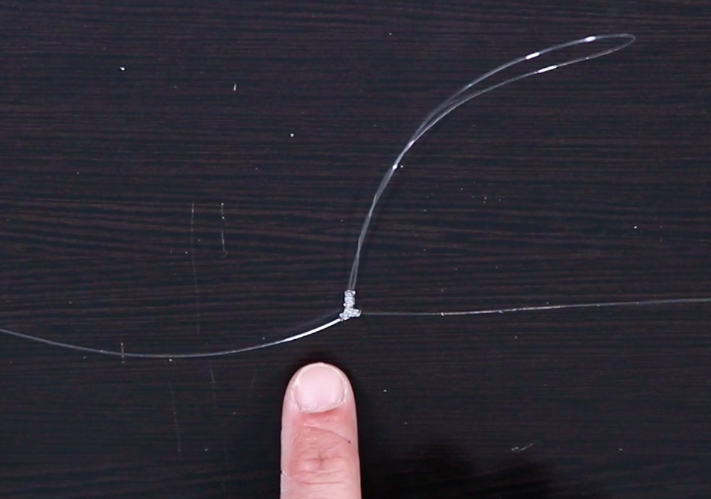
Step #6: Repeat steps 1-5 several inches down the line towards your tag end
This will create a second T knot where the low hook will go.
Step #7: Form a simple loop and tie 2-3 overhand knots to create a loop for your weight at the tag end
Step #8: Attach the weight to the rig by putting the loop through the eye of the weight, then slipping the loop over it

Step #9: Cut one side of each loop
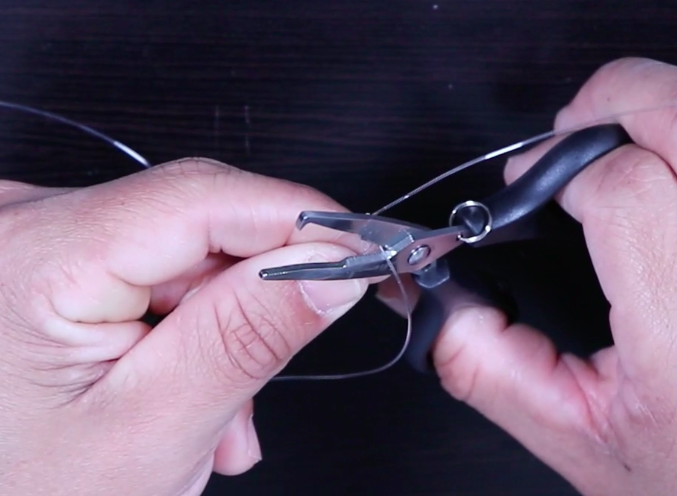
This will leave you with two single strands of leader, as opposed to two loops.
Step #10: Attach the hooks to the end of the leader strands with a snug knot
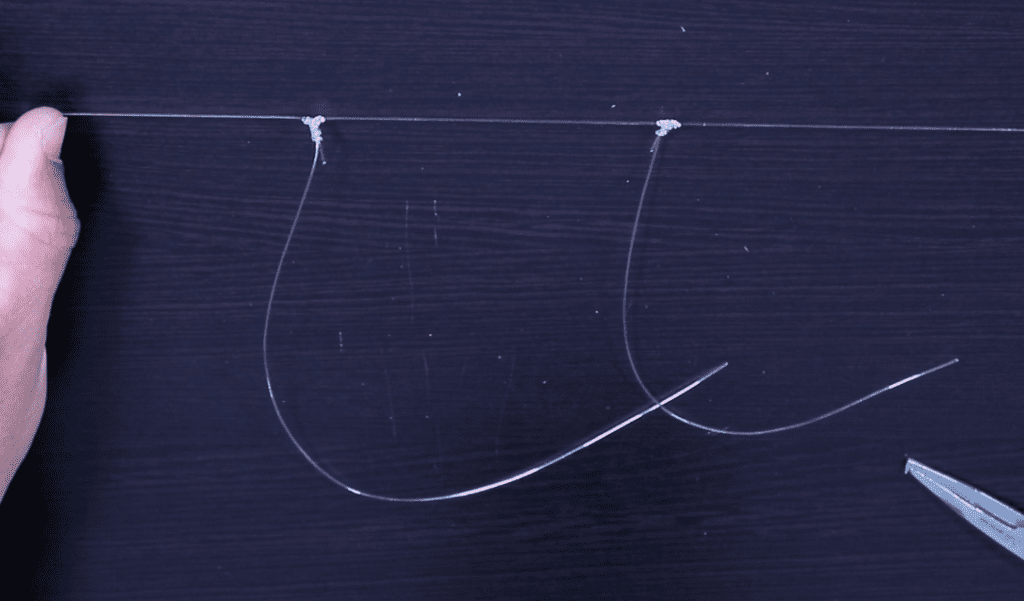
In this rig, the two strands are about three inches apart. Normally, you’d want them about 5-6 inches apart. This rig takes some practice!
Conclusion
The high low rig is a great rig for sheepshead because you have two hooks that can double your chances of catching fish, plus you can test out two different baits (i.e. shrimp vs. fiddler crabs) to see what they’re eating.
However, tying this rig does take some time and practice, so don’t expect to tie it for the first time while out on the water.
Have any questions about this rig?
Let me know in the comments below!
And if you know someone who needs to learn how to tie this rig, please TAG or SHARE this with them!
P.S. Want access to the best fishing spots, tips, and exclusive gear and discounts? Click here to join us and +11,000 other anglers in the Insider Club!
Stop Wasting Time On The Water!
Do what the “SMART ANGLERS” are doing and join the Insider Club.
Here’s what you’ll receive today when you join:
- Weekly fishing reports and TRENDS revealing exactly where you should fish ever trip
- Weekly “spot dissection” videos that walk you through all the best spots in your area
- Exclusive fishing tips from the PROS you can’t find anywhere else
- Everything you need to start catching fish more consistently (regardless if you fish out of a boat, kayak, or land).
Click here to join today.
Related articles:
- How To Tie A Dropper Rig (The Quick & Easy Way)
- The Best Fishing Knots Of All Time [Ranked Strongest To Weakest]
- How To Texas Rig A Live Shrimp (Weedless Shrimp)
- How To Catch Sheepshead (Plus PDF Cheat Sheet & Catch Card)
Disclaimer: When you buy through links on our site, we sometimes earn affiliate commission from places like Amazon, Bass Pro, Tackle Warehouse, etc. It’s one more way we can help you quickly find the best deals on the web while making sure we’re still around to serve you for years to come (and you do want us to be around to help you catch fish for many more years, right)?
Related categories:
STOP WASTING TIME ON THE WATER!
Do what the “SMART ANGLERS” are doing and join the Insider Club.
Here’s what you’ll receive today when you join:
- Weekly fishing reports and TRENDS revealing exactly where you should fish every trip
- Weekly “spot dissection” videos that walk you through all the best spots in your area
- Exclusive fishing tips from the PROS you can’t find anywhere else
- Everything you need to start catching fish more consistently (regardless if you fish out of a boat, kayak, or land).



Thx Tony. Instead of tying off your hook loops and cutting 1/2 off, you might want to try putting twists in the loops by rolling the line on both sides of your loop with your thumbs and forefinger rolling in opposing directions. After you twist it, pull both sides of the line out and slowly let it recoil back together to tighten up the twists. Then tie off the loop at its base just like you did and proceed just as you did to create the T knot. This double thickness holds the hook out further from your main line and also allows you to switch out hooks just like your doing with the sinker.
Great tip thanks Tim!
I like using that rig on drift boats for snapper and such. What is a good rod to feel some of those sensitive bites and still be able to haul in a decent-sized mutton.
Good stuff! I’m not too familiar with offshore gear.
Hi Tony, Thanks again for another great video! Can’t wait to try it!
Tight lines,
Bob
No problem Bob! Thank you for the great feedback!